
Homeschool Projects are projects that ensure that kids go beyond what they learn about in books or online.
As they work on these homeschool projects, they will be able to incorporate important academic concepts, as well as develop their problem-solving, critical thinking, and communication skills, all while they gain deep knowledge of a particular topic.
As a result, children can actually embrace the learning process, make real-world connections, and, basically, teach themselves how to learn. Without much ado, let us look at some of the homeschool projects you should introduce to your kids.
The list of homeschool projects & Experiments
- Compost Cups Science Project
- The 4th of July Robot Craft
- Animal Cell Models with Pizza
- Clicking Quarter Experiment
- Gardening with Kids
- Make a Butterfly Garden
- How to Make a Compass project
- How to Make a Science Experiment Box
- How to Make Sponge Water Bombs for Summer Fun
- Penny Cleaning Experiment
- Paint Your Own Christmas Wrapping Paper
- Sink or Float Science Experiment
- Testing for Starch Science Experiment
- BBC microbit projects
- Homemade lava lamp project
Read on as we give a quick look at each of these homeschool projects listed above.
Compost Cups Science Project
The Compost Cups Science Project is one of the homeschool projects that you might be interested in.
The project can start by enlightening your kids on what decomposition and composting are.
Decomposition is the process in which organic materials are broken down into simpler forms of matter.
When leaves fall and plants and animals die, they start this process of decay.
Insects, bacteria, and fungus all carry out decomposition.
In the end, dead matter turns back into the soil after decay.
Make Your Own Compost Cups
To study composting up close, you can create your own mini compost bins in cups, so that the kids can see decomposition in action.
You can make your own compost cups science project with these easy steps.
See the steps.
The 4th of July Robot Craft
Sometimes it’s hard to find a craft for boys. You will be needing materials like 4 tin cans (2 for feet, 1 for a body and 1 for the head), paper for the arms and face, tape, hot glue, paint, glitter, stickers, and anything else that you will be needing to decorate your robot. Below are the steps:
- Choose which cans will be which part of the robot
- Decorate the cans with paint, paper, glitter or stickers. Be creative
- Make facial features out of paper and glue or tape them on the head can
- Cut 6 – 8 strips of paper approximately. Form them into a circle and tape the ends together
- Tape 3 or 4 of the rings together along one side to form a bendable arm. Tape or glue them to the body can
- With the open end of the leg and body cans facing down, glue the cans together so the leg cans support the body can
- With the open end of the face can facing up, glue the head can to the top of the body. Fill with utensils and enjoy your usable art
See the picture here.
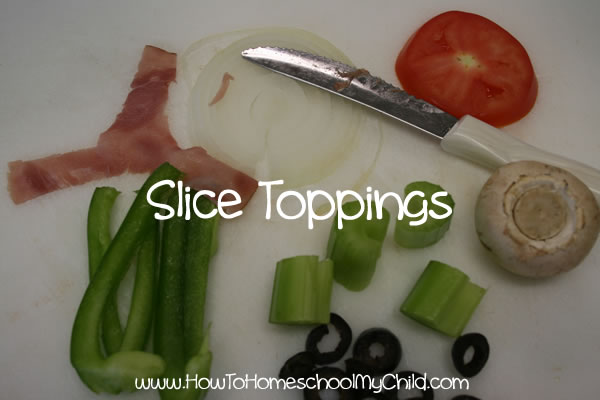
Animal Cell Models with Pizza
Making an animal cell model with pizza is one of the favourite activities in homeschooling.
Whether you are doing high school biology or elementary health, making a pizza model of a cell is fun.
Using food is one of the favourite ways to encourage a love of learning in your kids. Who doesn’t like eating and learning?
The steps are:
- Brown all the sausage and freeze it for future meals
- You can use pre-made pizza sauce, you can equally make your own. Add garlic powder, basil, pepper to a can of tomato sauce…easy!
- Spread sauce on crust. Leave a border of crust to resemble the cell wall
- Slice toppings. The ham piece was the hardest
- Place tomato & mushroom in center to symbolize nucleus & nucleolus
- Bake pizza in your oven. Follow directions for the crust you use
- After baking, allow kids a chance to identify the organelles. Then Eat & Enjoy!
See the full description here.
Clicking Quarter Experiment
One concept that can be hard for your kids to grasp is that air is matter.
Air takes up space and takes up different amounts of space depending on its temperature. In this experiment, you will demonstrate these concepts.
You will be needing a quarter, plastic bottle, freezer, and water.
+ Place the empty plastic bottle, with the cap removed, in the freezer for 10 minutes. After 10 minutes, remove the bottle from the freezer and set it on a counter or table.
+ Wet the quarter with a little water and place the quarter over the opening of the freezing cold bottle.
You should see the quarter moving up and down and making a clicking sound. The air inside the bottle is warming, so it is taking up more space.
As it expands, it pushes up the quarter on the top of the bottle. When the quarter comes back down, it makes a clicking noise.
Gardening with Kids
Through this particular project, the kids will learn through gardening. They will understand that the weather means a lot when you are growing a garden.
They will understand that pests are very real things. They will also learn that bugs can eat your harvest before you even have it ripe.
The kids will learn that farmers work really hard to get food to the market and grocery stores.
They will also learn that growing thing take patience. A little seed takes a while to become your favourite vegetable or fruit, and work goes along with it.
Finally, they will learn that real work gives real results. therefore, they have to work hard. Read more about this project and its steps.
Making a Butterfly Garden
This is one of the homeschool projects where students will learn how to attract butterflies to their yard by creating a butterfly garden.
It takes a little dirt and a little planning. Below are the steps to planning your butterfly garden:
+ Determine what butterflies are found in your area
+ Research what plants you want to grow
+ Design your garden
Steps to planting your butterfly garden:
+ Prepare your soil
+ Plant your garden
+ Add butterfly houses
Butterflies are not terribly skittish. They will visit your garden even when you are in the yard or sometimes while you are tending your plants.
All your kids will need to do is to keep an eye out for new butterflies and caterpillars. You might advise them to keep a butterfly journal. See the steps and detailed description.
How to Make a Compass
Kids are always fascinated by compass. The beautiful thing about this homeschool project is that you already have the items in your house.
Whether you’re studying pirates, magnets, magnetic fields, or directions, this is an easy science activity to include in your homeschool week.
Find out more about this project.
How to Make a Science Experiment Box
For the science experiment box project, for each child, you will need to make a list of all the supplies your curriculum requires.
Gather all the supplies that you will be needing. Combine all the supplies for each child in their own plastic bin with a lid.
Store your science bin on an easily accessible shelf so the kids can grab it when they need it. See how you can carry out this project.
How to Make Sponge Water Bombs for Summer Fun
Just like other homeschool projects, there are supplies for this project as well. You will be needing 3 sponges per water bomb, scissors, and strings.
Cut each sponge into five even strips lengthwise, and stack the strips on top of each other.
Tie tightly in the centre with the string, and then tie into a double or triple knot.
Fan the strips out so it looks like a tentacle ball, and make some more.
Once you have enough sponge water bombs to have a water fight, soak them in a big bucket and call the kids over to play. See the pictures and full steps.
Penny Cleaning Experiment
This is one of the interesting homeschool projects you should carry out. The Penny cleaning experiment requires you to pull out a few pennies.
Make sure there is a mix of old pennies and new ones.
Ask your kid to compare the old pennies and the new ones.
The older ones will be dingy and dark, while the newer ones will be bright and shiny.
Depending on the age of the kid, you can enlighten them on copper oxide. Explain that everything is made up of atoms and that atoms join with atoms to make molecules.
That means that copper atoms on the surface of the penny join with oxygen atoms from the air to form copper oxide.
Therefore the pennies turn dark and dingy. See the details about this homeschooling project.
Paint Your Own Christmas Wrapping Paper
If you’re looking for a super easy thing to keep your kiddos busy during snowy, cold afternoons, try encouraging them to paint their own wrapping paper for all of the gifts they’ll be giving this season. It’s simple, inexpensive, and a lot of fun.
This project will be requiring a large roll of drawing, craft, or butcher paper, paints, stamps, sponges, and/or brushes. Drop cloths or plastic will also be required. See the steps.
Sink or Float Science Experiment
Sink or Float Science Experiment is one of the homeschool projects that requires you to collect random objects of different weights and shapes from around the house.
Objects like marbles, stick matches, hot wheel cars, spoons, gapes, or other things that can get wet.
Use a dishpan, large bowl, plastic container, sink, or bathtub and fill your container with water.
Then you can place each of the objects into the water, but before you do, you have to make predictions about whether each one will sink or float.
Carefully, place each object into the water. Dropping them hard or throwing them will impact what they do without being scientific.
Record if the object floats or sinks and then discuss the reasons with your kid. See details.
Testing for Starch Science Experiment
This is also one of the interesting homeschool projects. There is an easy indicator for starch that you can do at home.
You might already have an indicator solution in your medicine cabinet-Iodine.
When iodine comes into contact with starch, the iodine turns from orange to dark blue, instantly.
As one of the homeschool projects to carry out, you can test if your foods contain starch, place several foods that you want to test on a plate and simply add a drop of iodine.
This test will not work for sugar, another type of carbohydrate.
The kids will learn that starch is made up of two components-amylose and amylopectin and it is the amylose molecules that react with the iodine ions and create the blue colour. See details.
BBC microbit projects
With the Makecode Editor from Microsoft, you can program your microbit to do all sorts of things.
It is one of the interesting homeschool projects whereby students are exposed to some coding skills.
You can buy a microbit fairly cheaply online and find out how to program it by visiting the microbit website. See details.
Homemade lava lamp
Primary age children will love making their own lava lamp but older students may enjoy it too!
You will be needing a clean and clear 1 litre plastic bottle, vegetable oil, ¾ cup of water, fizzing tablets like Alka Seltzer and food colouring.
What are your thoughts about these homeschool projects? Please share other homeschool projects you know with us.
+Pour the water into the bottle
+Use a funnel to pour the vegetable oil into the bottle, almost filling it up. Wait a few minutes to let the water and oil separate.
+Add drops of food colouring, about 10 drops will work (any colour you like).
The colouring will pass through the oil and mix with the water at the bottom of the bottle.
+Break a fizzing tablet in half and drop it into the bottle.
It will sink to the bottom and the bubbly action will start!
+To keep the colourful bubbles going add the other half of the tablet.
See directions.
Editor’s Pick
- Schools preparing students for the future
- Special needs schools in Canada
- Homeschool Projects
- International teacher recruitment agencies in USA